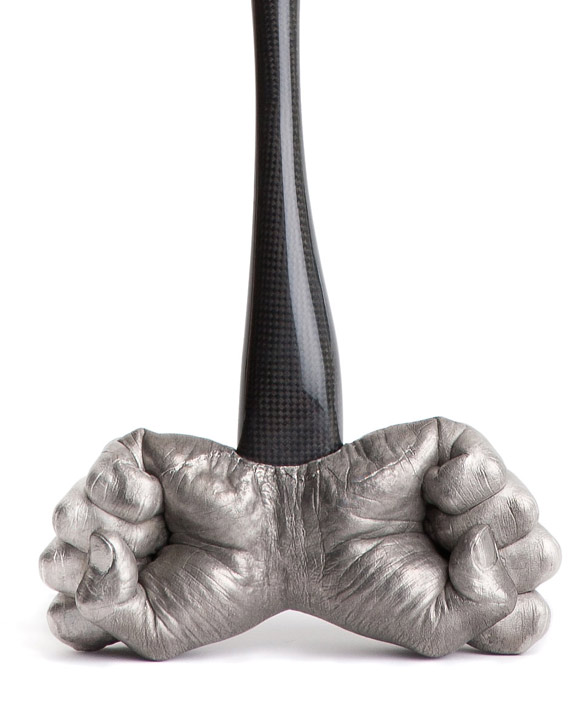
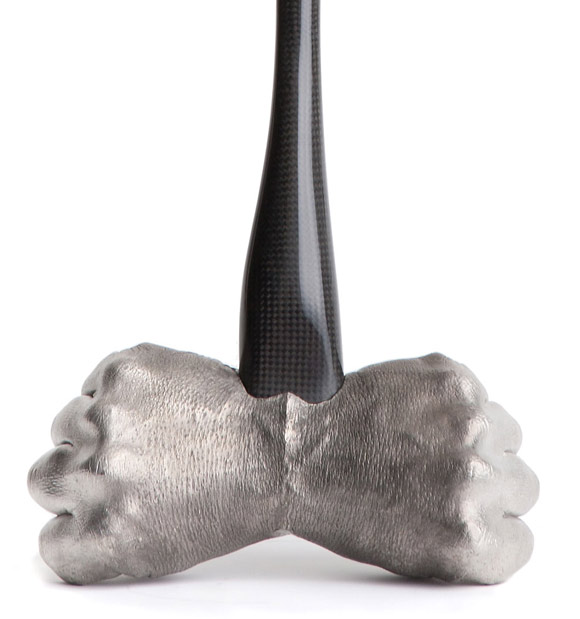
This post was guest blogged by Francis Baker, an internationally exhibited artist working in photography and sculpture. More work can be seen at his website.

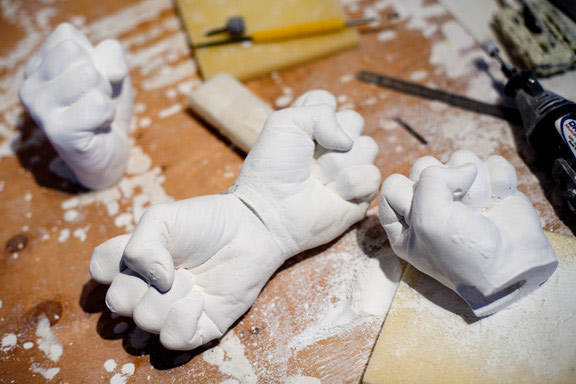
I woke still staring into a dream, feeling that make believe world’s emotion. A few sketches and a cup of coffee, I started in on what would become the sculpture 16lbs hammer. I wanted to make a sculpture that spoke to emotion and empowerment, as well as, a means to control that power. I started in on the easy part, casting my fists in plaster then alloy.
The handle needed to soar up out of the fists. I was aware of the work of Peter Donders and Espacio Sami Hayek from the Carbon Fiber Gear Site. I was hooked on the idea of making it out of carbon fiber. It’s strong, light, beautiful; and lets face it, just about everything right now is being covered with it, giving this sculpture an underlying discourse about consumerism. I scoured the Carbon Fiber Gear site, as well as, YouTube for all the information I could get. I ordered the book Composite Materials by John Wanberg. By the time it arrived in the mail, I had purchased the best materials locally and was ready to dive in. I discovered that while carbon fiber has a certain cost associated with it, the true cost is in labor. By the time the sculpture was finished and assembled, it truly became a labor of love.
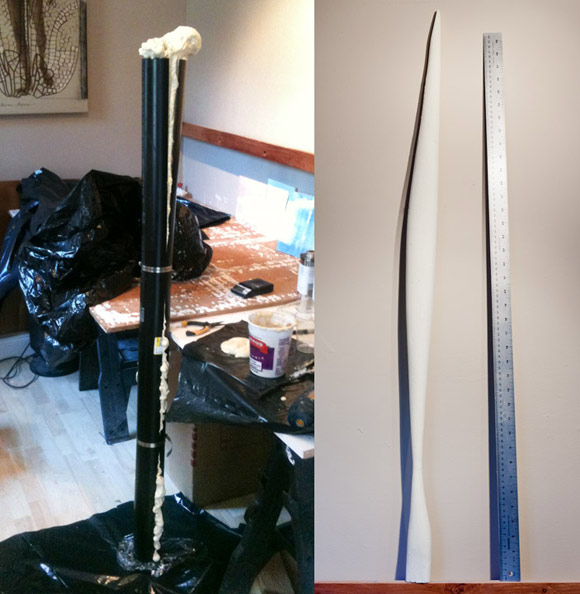
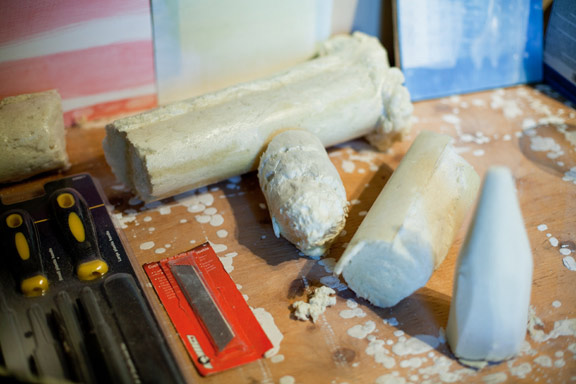
I carved the handle out of 3 lbs expandable foam. This is really cool material.  I cast it into an ABS tube, from the hardware store, that I cut in half. When using this material, remember to apply a wax mold release. I thought I could get away with some universal spray mold release I already had. The foam just stuck to the plastic and I had to start over with a new mold. You can carve the foam with a utility knife and shape it with a basic set of files. I appropriated the form of Brancusi’s bird in space as a reference point for spiritual flight, and elongated it for the handle. It is interesting to me how ideas about materialism and the desire to transcend consumerism have been with us for a long time; yet, feel more current then ever. Any way, you have to be careful with the foam plug as it is hard to add material if you carve out too much. Anything you add to it, including more expandable foam, will have a different density and structure and will not create a smooth surface.
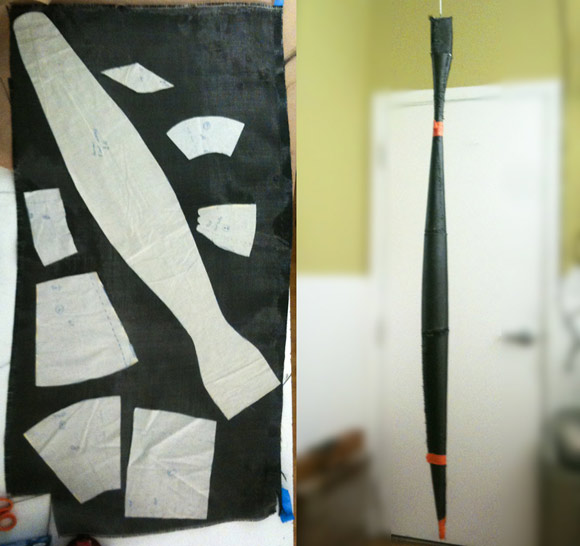
I had the idea to break the form down to 7 sections, making sure to cut the 284 carbon fiber twill on the bias. My thought was to add strength to the narrowest part by giving it many more layers than the rest. I layed it up by wrapping with electrical tape. This part all went smoothly. I had plenty of time to wet out all the pieces and position them. After it cured, I used a file to smooth out any seams. The little fibers get stuck in your skin, are hard to get out, and will itch so wear gloves.  I found this out the hard way. Next, I cut the final single piece of carbon fiber that will be the layer showing. Because one will be able to see the all the way around the sculpture, I had to take care of the seam. I wet out about 3/4 way around the sculpture then held it tight with clips. Once this was mostly dry to the touch, I moved the clips, cut the carbon with a utility knife and wet out the remaining section. I did it this way so I could get the fiber to be form fitting and so that the fibers would not fray at the edge. I did this process two more times till I got the seam to look the way I wanted it to, then let it to cure for two days. Unfortunately, I do not know much about the vacuum bag technique; however, I speculate this might be the best way to do this whole process in one step.
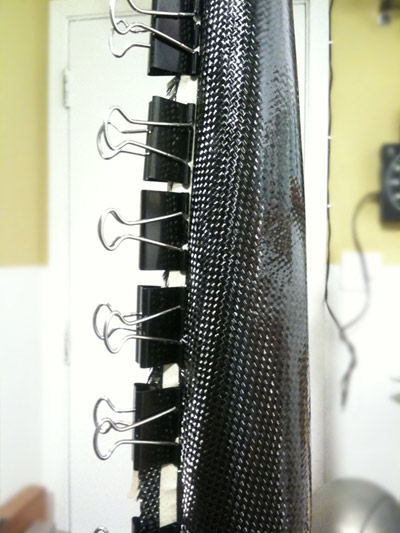
On to the flood coat. I made some time consuming mistakes on this step. I was mistaking this epoxy flood coat for what should be the top coat. I applied a coat of epoxy, sanded, notice some imperfections, applied another coat, rinse and repeat. I was obsessed but not getting it perfect. I was getting little air bubbles so I would sand them away and reapply. Next time, I will apply one flood coat of epoxy and baby sit it to get out as many of the bubbles as I can. Then I will move on to the top coat. This coat is a UV protecting polyurethane. I applied about 7 layers spaced between 2 and 8 hours apart.  I started sanding this with 220 grit sand paper. I took a lot of care with this because I did not want to go too deep, just to get a nice even finish. I moved to a cloth based sanding system for the 400, 1200 and 2000 grit. For the final polish I used plastic polishing products by Novus. Their #2 grit really did a great job fast. I cleaned it up with the #1 spray and: tada!

In the mean time, I decided to change the orientation of the fists so they can form a base that stands upright on its own. It is also aesthetically more pleasing to me this way. So while the handle is setting up, I cast my fists again in plaster. I ran out of Hydrocal plaster and deiced to use some tufstone left over from a different project. Tufstone has little bits of fiberglass in the plaster that makes it really strong. The drawback is that it does not pick up details as well…back to the store for more hydrocal and more casting. Finally the plaster cast of the fist was ready and I could make the platinum cure mold and cast the alloy.
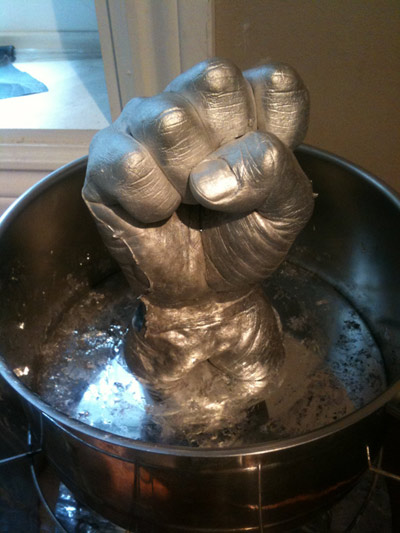
The first time I cast the fists, I though 8 lbs of alloy would be plenty. It wasn’t. I raced around looking in my studio for more material I could cannibalize before the alloy cooled. I remembered an old project I never finished, in which I cast a child size heart in alloy. I did polish one heart but three were still in the raw state so into the pot they went. Arrgh, still not enough. Luckily, I can re-melt the alloy and add more without any loss in the properties of the alloy. The next day I got on the motorcycle and got 4 more lbs. Ok, do you see where this is going? This was still not enough…back to the supplier, a 4th time. Finally, at around 16 lbs, I had just enough. A little filing, sanding, adding patina and a protective coat and it’s ready to assemble!


